


Are you thinking about starting a business and looking for tools to help you efficiently manage accounting and administrative issues? Or maybe you already run it, but "paperwork" takes up too much of your time? Meet Banqup, a platform dedicated to entrepreneurs who value their time and want to go paperless in managing their business. In this post we will introduce you to the main menu of the Banqup platform and how to manage your company's profile.
Are you thinking about starting a business and looking for tools to help you efficiently manage accounting and administrative issues? Or maybe you already run it, but "paperwork" takes up too much of your time? Meet Banqup, a platform dedicated to entrepreneurs who value their time and want to go paperless in managing their business. In this post we will introduce you to the main menu of the Banqup platform and how to manage your company's profile.
Planning to start a business? Learn how to do it online with our step-by-step instructions.
And here you will find detailed information on how to create an account on the Banqup platform.
After logging into your Banqup account you will see the Dashboard tab. There you will find a summary of your company's financial information. With an easy-to-read preview, you will be able to assess your financial situation at a glance.
On the left side of the screen you will see the main menu, which allows you to navigate the platform freely. No matter which section of the application you are in, the menu will always be in the same place.
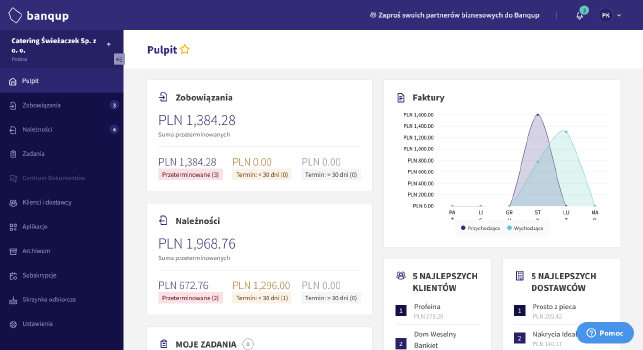
Each main menu tab gives access to different information and a range of functions:
- Dashboard - a summary of your company's financial information, which, thanks to a simple preview, easily allows you to assess the current financial situation;
- Payables - from here you have access to all your incoming invoices, for ease of use they are marked with statuses that hint at which ones need attention first;
- Receivables - here you will find all your outgoing invoices, they too have markings so you can quickly see if any of them require your intervention;
- Tasks - this is where the application will notify you of additional activities to be performed;
- Document center - this is a secure place where you will be able to store important company documents that are not invoices, and share them with your accountant;
- Customers and suppliers - this is your private directory of contractors, which will facilitate your daily cooperation with them, you will be able to freely add, delete and modify the data of the companies you work with to make the invoicing process even simpler and faster;
- Applications - Banqup is designed to integrate with other applications, here you will be able to manage them freely;
- Archive - this is where all documents no longer requiring action will be stored, Banqup can keep your documents securely for as long as required by law;
- Subscriptions - here you will be able to manage your subscriptions and choose the ones that are optimal for you at the moment;
- Inbox - you can also receive invoices in Banqup via email, in this section you will be able to review and accept them;
- Settings - here you will be able to customize the application to your needs, this section is built for ease of use but maximum customization.
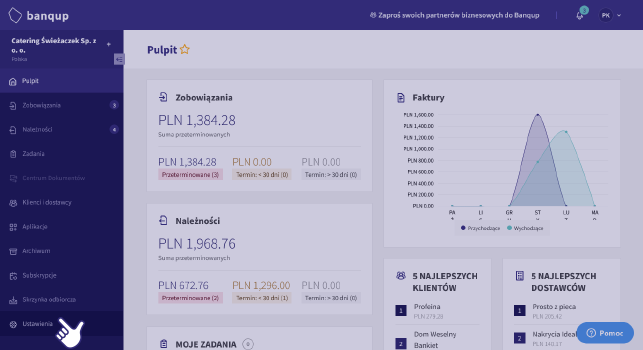
Before you start using all the available features of the application, make sure that all the information about your company on the Banqup platform is completed and correct. To do so, click "Settings" in the menu on the left side of the screen.
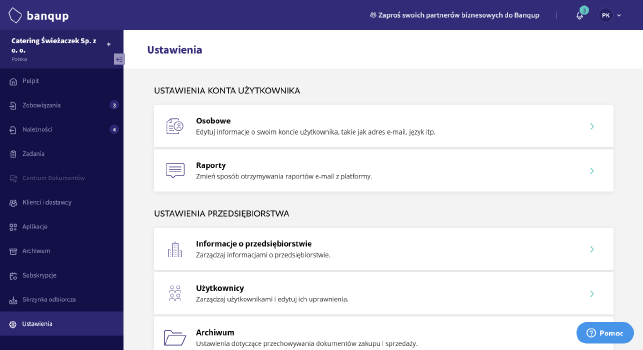
In the settings panel, select the "Company Information" tab.
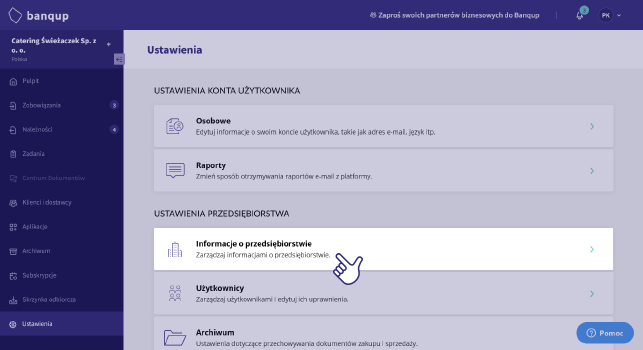
In addition to the basic information about your company provided earlier, you can add much more data in this tab. There is room for contact information, such as your email address, phone number and website address. You can also add your company's logo here, which will appear on your Banqup invoices.
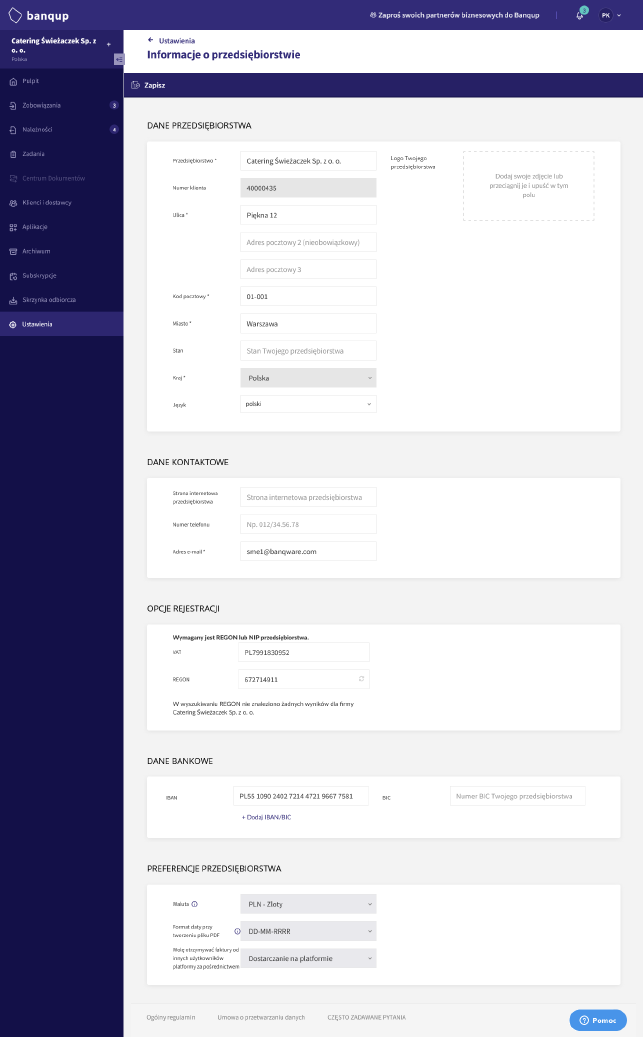
In this tab, it is also worth completing the following data set, which will further improve the invoicing process:
- The IBAN number of the company and the BIC (SWIFT) code of the bank, which will appear on outgoing invoices,
- The default currency in which invoices are to be generated,
- Preferred date record format,
- Preferred form of receiving invoices from other Banqup users.
.jpg)
.jpg)
%20(1).jpg)


